Quick start
Five minutes from install to your first fixes.
1. Run your first scan
- Go to A11yScanFix -> Dashboard.
- Choose which post statuses to include (Published is on by default).
- Click Run Full Site Scan.
- Keep the tab open while it runs. Results fill in live.
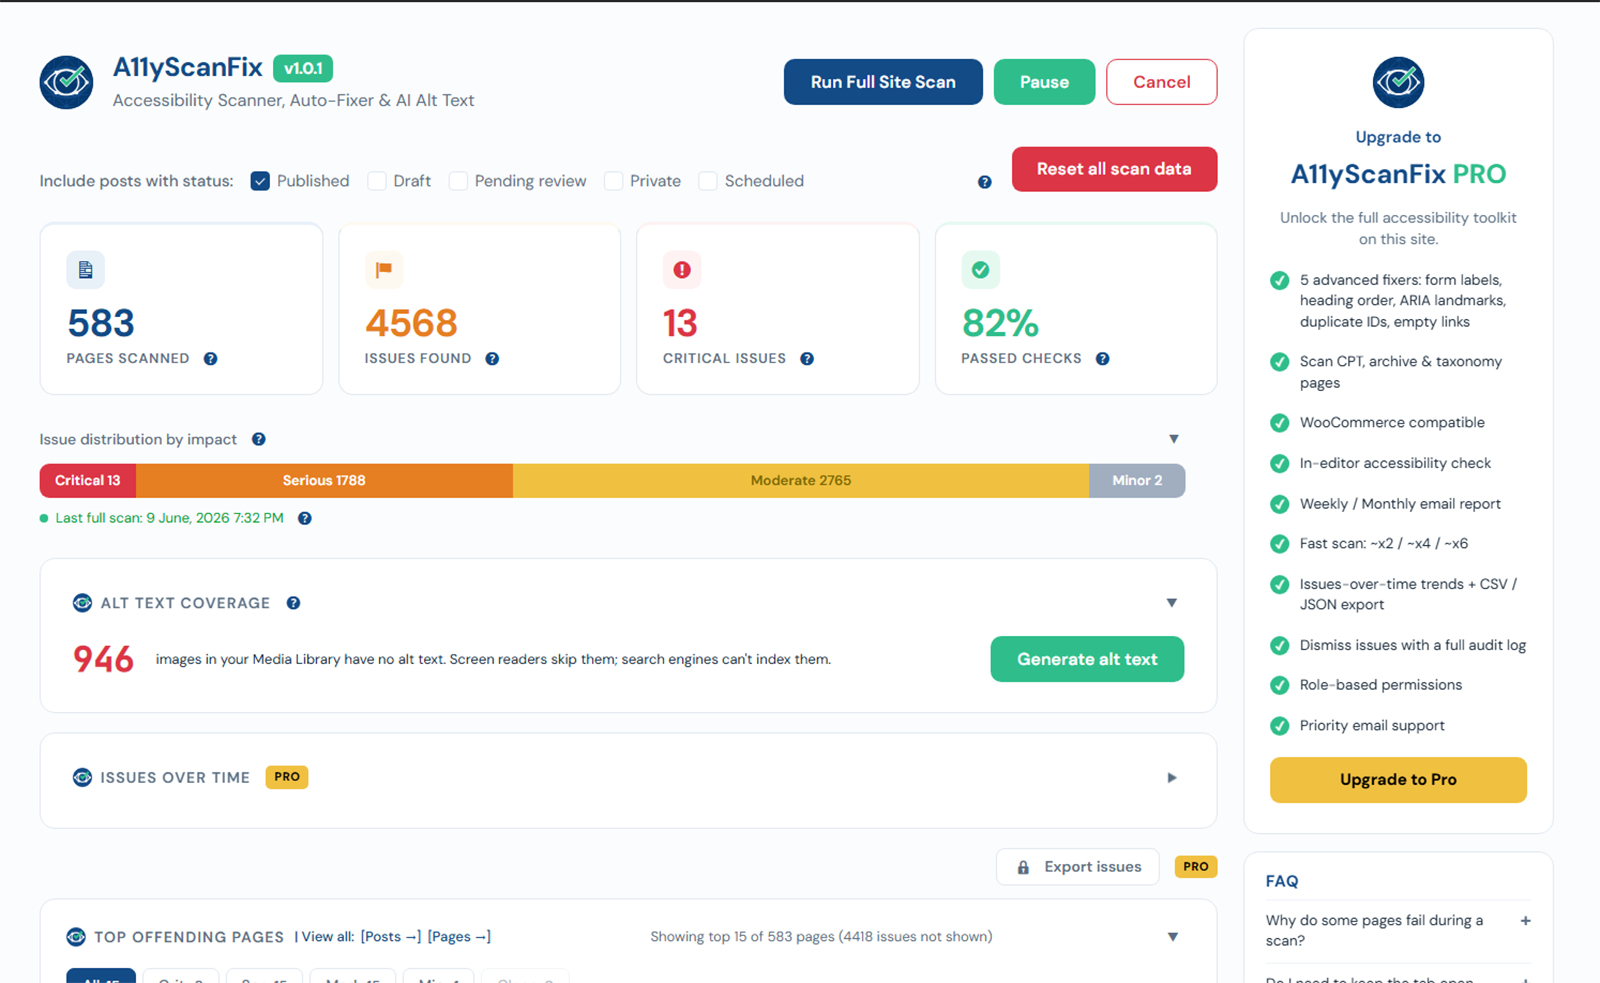
2. Review the results
The four cards show Pages Scanned, Issues Found, Critical, and Passed Checks. Below them, Top Offending Pages and Most Common Issues show where to start. See Dashboard overview.
3. Turn on fixers
- Go to A11yScanFix -> Fixers.
- Toggle on the fixes you want (start with skip links and focus outlines).
- Save. Fixes apply on the front end immediately and are fully reversible.
See Fixers overview.
4. Set up AI alt text
- Go to A11yScanFix -> AI Alt Text.
- Choose a provider and paste your own API key.
- Optionally turn on Auto-generate on upload.
- Use Bulk generate to fill alt text for existing images.
See AI alt text.
5. Publish an accessibility statement
Generate a statement page and link it in your footer. See Accessibility statement.